Getting kids to eat veggies is not always easy. That’s why kid-approved vegetable recipes are so helpful for families. These recipes are simple, fast, and full of flavour. Even picky eaters will enjoy them. Because of that, you can serve vegetables without stress. These ideas are great for lunch, dinner, or even snacks.
Also, the meals are healthy and packed with nutrients. They help your child grow strong and stay active. But they are still fun to eat. With these recipes, you won’t have to fight over veggies anymore. Plus, they use ingredients you already have at home.
In this article, we will explore some of these kid-approved vegetable recipes. We will also give you tips to make them tasty and colourful. That way, your kids will love them even more. So let’s get started and turn veggies into favourites. After all, meals should be healthy, fast, and loved by kids.
About Kid-Approved Vegetable Recipes
We’re always trying to find new veggie side dishes for family dinners. It is in the experience of parenting and caregiving that one notes what a child likes, another might not enjoy.
Some kids may enjoy spicy meals and add hot sauce to nearly everything, while others can be triggered by those exact spicy meals. So, it is important to find a balance in these situations, and also because it’s hard to tell what the kids might end up liking.
One of the best ways to help children eat more vegetables is by making them taste good to adults, too. These kid-approved vegetable recipes are a good starting point, especially if you’re trying to bring in new vegetables or prepare old ones in different ways.
It’s clear that vegetables are important for children’s health in many ways, but kids often don’t want to eat them. So, finding ways to make veggies simple to eat and delicious can make a difference.
Also, keep in mind that children may need to see a certain vegetable over 20 times before they feel ready to give it a try. You don’t need to count the times. It’s more about understanding that learning to enjoy vegetables takes time.
Try to show them how you enjoy eating those foods, give them small servings without any pressure, and make sure the veggies you want them to eat are often available at home.
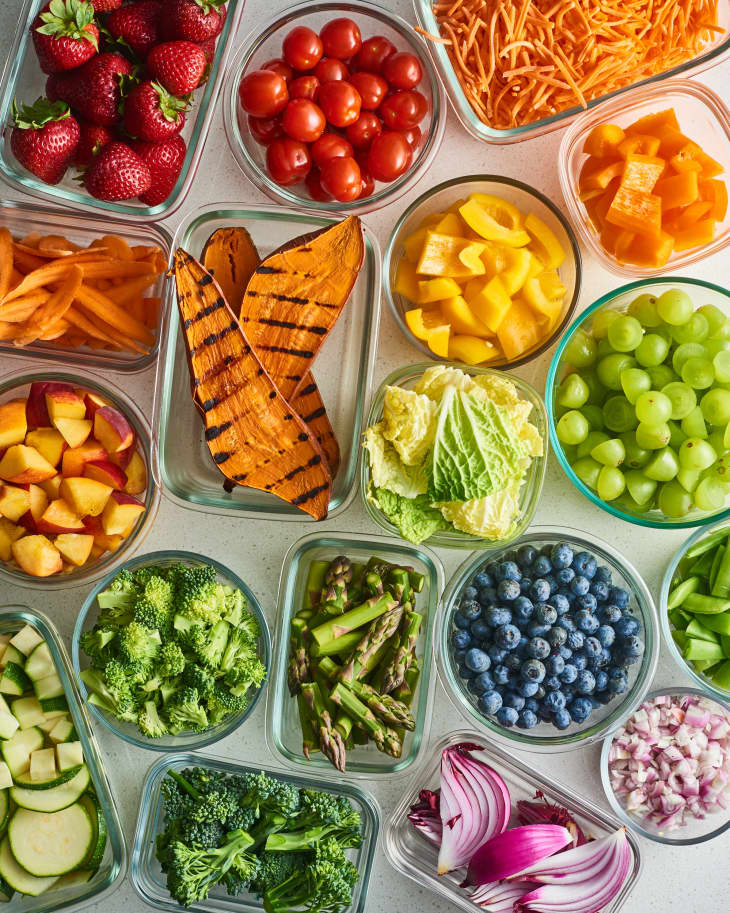
Considering all these, here are some of the best kid-approved vegetable recipes which are simple, tolerable, healthy, and great for easy weeknight meals with kids.
Here Is a List Of Vegetables for Kids
This isn’t a full list of every recipe out there (that would be huge!), but it’s a great starting point if you want to add more veggies to your child’s meals.
This should help you get going with trying a few options. The list of kid-approved vegetable recipes includes vegetable side dishes, main meals, snacks, and even breakfast ideas. Let’s get into it!
1. Asparagus Dishes for Children

In spring and even all year long, asparagus is a popular veggie to enjoy with the whole family. Baked Asparagus in the oven is one of the most delightful and healthy, kid-approved vegetable recipes to try.
It is a game-changer, and it is super simple to prepare. Just coat the asparagus with a bit of oil, add a pinch of salt, and let the oven do the work to make the stalks nice and tender.
What You’ll Need
Here’s a quick look at the ingredients you’ll need to make this simple roasted asparagus dish, so you can be ready.
- Asparagus: Both thin and thick stalks work. It’s best to use ones with the same thickness so they cook evenly.
- Olive Oil: Go with extra virgin olive oil to coat the spears. It helps them turn tender with slightly crispy tips.
- Salt, Pepper, Lemon Zest, Parmesan Cheese: These are optional toppings you can sprinkle on after roasting to add flavour.
Instructions
- Rinse and dry the asparagus.
- Snap off the hard, woody ends.
- Toss the spears with olive oil and lay them on a baking tray.
- Roast them in the oven until soft, then add any toppings you like.
Storing Leftovers
Put any extra roasted asparagus into a sealed container. You can reheat it before eating or mix it into a cold pasta salad.
Helpful Tips
- For the freshest taste, try this in spring with asparagus from a local farm.
- Top with a little salt, pepper, lemon zest, or Parmesan cheese for extra flavour.
- Great for baby-led weaning; just skip the salt.
- Serve alongside foods like Fish Nuggets, Chicken Tenders, Orzo Risotto, or Chickpea Fritters.
2. Simple Boiled Beets

Beets offer plenty of fibre and are packed with antioxidants. They have a strong, earthy taste that some kids enjoy right away, while others might need more time to get used to it.
Cooked beets are naturally sweet, soft, and easy for kids to chew. When you add a bit of butter and a sprinkle of salt, they taste amazing. This easy recipe for boiled beets takes about 30 minutes and doesn’t need much attention while cooking. It’s also a great dish to prepare ahead of time and warm up later!
What You’ll Need
You can make this recipe using either golden beets or red beets. Both of them are okay, depending on which one is available. Red beets are usually easier to get in most grocery stores, while golden beets may only show up at certain times of the year, mostly at farmers’ markets. The taste is nearly the same, and they cook the same way.
Instructions
- Wash the beets, cut off both ends and chop them into equal-sized pieces for even cooking. No need to peel them first.
- Place the chopped beets in a medium or large pot and cover them with water.
- Bring the pot to a boil, then lower the heat so it gently simmers until the beets are soft.
- Drain the water, rinse the beets under cold water, and rub off the skins with your fingers.
- Mix in a bit of butter or olive oil and a pinch of salt before serving.
What to Serve with Boiled Beets
You can serve boiled beets with zucchini burgers, hot dogs, baked chicken nuggets, sandwiches, or even kids’ salads.
Beets for Babies
Cut the beets in halves or quarters and cook them until soft to serve as finger food for baby-led weaning. Blend cooked beets into a puree as a Stage 1 food for a smoother option. You can also mix the puree with baby-friendly foods like quinoa, plain yoghurt, mashed avocado, or even pureed chicken for a Stage 2 or 3 meal.
Storing Tips
Leftover beets can be kept in a tightly sealed container in the fridge for up to 5 days. You can warm them a little or serve them cold or at room temperature.
Helpful Tips
- Chop beets into similar-sized pieces to help them cook evenly.
- Let them cool before peeling to make handling easier. Cold water helps the skin slide right off.
- Cut the beets into smaller pieces for younger children if needed.
- Add extra flavour with toppings like shredded cheddar, crumbled goat cheese, or feta.
- Use leftover beets in your salad. Try them over greens with feta, sunflower seeds, and a hard-boiled egg or some chopped chicken.
To serve babies, either offer cooked beet chunks once cooled or blend them into a smooth puree. These are great for any meal, even breakfast for babies starting solids.
3. Maple Roasted Carrots

If you enjoy glazed carrots, then these Maple Roasted Carrots will likely become a new favourite. Roasting helps bring out their natural sweetness, and when you mix in maple syrup and butter, the carrots turn slightly caramelised with rich flavour.
What You’ll Need
- Carrots: (cut diagonally ¼ inch thick); 1½ pound
- Butter: melted 4 tablespoons
- Maple syrup: (pure): 2 tablespoons
- Salt: ½ teaspoon
- Black ground pepper: ¼ teaspoon
- Chopped fresh chives: ( optional); 2 teaspoons
Instructions
- Set your oven to preheat at 400°F.
- In a big bowl, mix the carrots with melted butter, maple syrup, salt, and pepper.
- Spread the mixture out evenly on a large-rimmed baking sheet.
- Roast in the oven for 20 to 25 minutes, stirring once halfway through, until the carrots are soft.
- If you like, sprinkle with chopped chives before serving.
Equipment Needed: Large-rimmed baking sheet
Helpful Tips
- This colourful carrot dish makes any meal look more inviting. You can use orange carrots or mix in rainbow-colored ones. There is no need to peel them; just scrub them well with a veggie brush.
- To cut down on prep time, use thin carrots if you find them. If using thicker ones, slice them into even pieces so they roast evenly.
- You can also add a fresh herb like parsley, thyme, oregano, marjoram, or basil. If you’re using dried herbs, use less since their flavour is stronger.
- For quick clean-up, line your baking sheet with foil or parchment paper. This helps avoid sticky messes from the maple syrup.
4. Broccoli Casserole

Say goodbye to plain steamed broccoli. This healthier version of broccoli casserole is bound to be a favourite. This Broccoli Casserole makes the veggies shine with flavour and comfort. We pack it with ingredients rich in antioxidants and plenty of taste, starting with onions, garlic, and loads of broccoli.
Instead of using milk, we add low-sodium chicken broth for a healthier twist. Creaminess comes from reduced-fat cream cheese and a perfect layer of melted Colby Jack cheese.
Nutrition Highlights
- Broccoli is packed with fibre, folate, antioxidants, and vitamins C and K. Eating it often can support your immune system and lower your chances of heart disease and cancer.
- Onions turn sweet when cooked and add quercetin, an antioxidant that supports heart health by helping reduce blood pressure, cholesterol, and triglycerides.
- Garlic is another heart-healthy ingredient that may lower cholesterol, blood sugar, and blood pressure.
- Cheese not only makes broccoli more appealing, but it also provides calcium for strong bones and protein for muscle health.
What You’ll Need
- Whole-wheat bread: 2 slices
- Broccoli florets: 2 pounds
- Extra-virgin olive oil: 2 tablespoons
- Butter (divided): 3 tablespoons
- Diced Onion: 2 cups
- Minced garlic:4 cloves
- All-purpose flour: ⅓ cup
- Low-sodium chicken broth:3½ cups
- Reduced-fat cream cheese: 6 ounces
- Worcestershire sauce: 2 teaspoons
- Ground pepper: ¾ teaspoon
- Salt: ½ teaspoon
- Colby Jack cheese, shredded: 2 cups
Ingredients
Preheat oven to 375°F (190°C) and grease a 9×13-inch baking dish.
Tear whole-wheat bread into pieces, pulse into breadcrumbs, and toast in 1 tbsp butter until crisp; set aside.
Steam broccoli florets for 3–4 minutes until just tender; drain and set aside.
In a large pan, heat olive oil and 2 tbsp butter, then sauté diced onions for 5 minutes.
Add minced garlic and cook for 1 minute until fragrant.
Stir in flour and cook for 2 minutes, forming a roux.
Gradually whisk in chicken broth, simmer until thickened (about 5 minutes).
Add cream cheese, Worcestershire sauce, salt, and pepper; stir until smooth.
Mix in 1½ cups Colby Jack cheese, then combine with broccoli.
Pour into baking dish, top with remaining cheese and toasted breadcrumbs, and bake 20–25 minutes.
Helpful Tips
Here are some helpful hints we discovered while testing the recipe to make sure it’s easy, tasty, and nutritious:
- Buying fresh pre-cut broccoli florets can save time. But whole broccoli heads are usually cheaper if you want to save money.
- To skip a step, use store-bought breadcrumbs instead of making your own. Two slices of bread equal about one cup of crumbs.
- Dice onions carefully instead of just chopping. It can reduce how much it makes your eyes water.
- Worcestershire sauce adds a special flavour. If you’re out, mix soy sauce with a bit of sugar as a backup. It’s not the same, but it works in a pinch.
5. Maple-Glazed Roasted Sweet Potatoes

This nutritious side dish features sweet potatoes coated in a mix of maple syrup, butter, and lemon juice, then roasted until soft and golden. The rich glaze that forms during baking turns this simple meal into something truly delightful.
These maple-glazed roasted sweet potatoes will be a favourite on your holiday menu. Rich in fibre and packed with antioxidants, these sweet potatoes soak up a buttery maple glaze that gives every bite a warm, sweet flavour.
A dash of lemon juice cuts through the sweetness, while a sprinkle of salt brings all the flavours together. This simple dish brings comfort and colour to any dinner table, especially during festive seasons.
Health Benefits
- Sweet potatoes, despite their name, don’t cause major blood sugar spikes.
- They are high in fibre and loaded with nutrients like vitamin A, which supports immune health and vision.
- Pure maple syrup is a natural sweetener from tree sap. When used in moderation, it offers some nutritional benefits like energy-boosting carbs and manganese, which helps the body process carbs efficiently.
What You’ll Need
- Sweet potatoes (peeled, cut) | 2½ pounds (1½-inch pieces)
- Pure maple syrup:⅓ cup
- Melted butter: 2 tablespoons
- Lemon juice: 1 tablespoon
- Salt: ½ teaspoon
- Ground black pepper to taste
Instructions
- Preheat your oven to 400°F.
- Place the sweet potato chunks in a 9-by-13-inch baking dish in a single layer.
- In a small bowl, mix the maple syrup, melted butter, lemon juice, salt, and pepper.
- Pour the mixture over the sweet potatoes and toss until coated.
- Cover with foil and bake for 15 minutes.
- Remove the foil, stir the potatoes, and continue baking—stirring every 15 minutes—until they’re soft and beginning to brown, about 45–50 more minutes.
Equipment Needed: 9-by-13-inch baking dish. This size ensures the sweet potatoes roast in a single layer, allowing even cooking and caramelisation.
Helpful Tips
- Sweet potatoes are sold year-round, but the freshest ones appear in fall and early winter. Pick those with firm, unblemished skin—no soft areas, cracks, or bruises.
- We prefer using orange-flesh types for this recipe, such as Beauregard, Jewel, or Garnet. These are naturally sweeter and denser than yellow-flesh varieties.
- For the best texture, peel the sweet potatoes. If you leave the skin on, scrub well with a veggie brush. Trim the ends and slice into rounds, then cut into 1½-inch chunks.
6. Mashed Butternut Squash

This roasted mashed butternut squash is simple yet full of deep, sweet flavour. Roasting the squash first brings out its natural sugars, so you don’t need much else; just add butter, salt, and a few warm spices.
You can keep it basic or add extra touches like honey, cinnamon, herbs, or even bacon for more flavour. The food processor makes it creamy, but mashing by hand works if you like it rustic.
What You’ll Need
- 2 butternut squash (about 1½ pounds each), halved and seeds removed
- 1 tablespoon olive oil
- 2 tablespoons unsalted butter, cut into pieces
- 1 teaspoon salt
- ½ teaspoon ground allspice
- Pinch of cayenne pepper
Instructions
- Preheat the oven to 400°F and line a baking sheet with parchment paper.
- Rub the cut sides of the squash with olive oil and place cut-side down on the sheet.
- Roast for 40–50 minutes, or until very tender. Let cool for 5 minutes.
- Scoop out squash flesh and transfer to a food processor.
- Add butter, salt, allspice, and cayenne. Process until smooth, about 1 minute.
7. Crispy Baked Kale Chips

Making crispy baked kale chips for your kid might just blow their mind away! Light, crunchy, and full of flavour, they make a healthy snack you’ll want to keep on hand. Just remember, don’t overcrowd the pan, and be sure to dry your kale well for the crispiest result.
What You’ll Need
- 1 large bunch kale, tough stems removed, leaves torn into pieces (about 16 cups)
- 1 tablespoon extra-virgin olive oil
- ¼ teaspoon salt
Instructions
- Position racks in the upper third and centre of the oven; preheat to 400°F.
- If the kale is wet, pat it thoroughly dry with a clean kitchen towel.
- Transfer the kale to a large bowl. Drizzle with oil and sprinkle with salt.
- Massage the oil and salt into the leaves using your hands to coat evenly.
- Arrange kale in a single layer on 2 large rimmed baking sheets, avoiding overlap. (Bake in batches if needed.)
- Bake for 8 to 12 minutes, switching pans top to bottom and front to back halfway through.
- Check early if using just one sheet to prevent burning.
Healthy Tips
- Any type of kale works, be it curly, lacinato (also known as dinosaur kale), or red Russian. If possible, choose organic kale to reduce pesticide residue, as kale can be tough to wash thoroughly.
- Rinse the kale well to remove dirt. Pat dry completely with a towel. Know that moisture leads to soggy chips.
- Use your hands to coat the kale evenly with oil and salt. The leaves should stay firm but look glossy and slightly darker.
- Don’t overcrowd the pan. To get perfectly crispy kale chips, spread the leaves out in a single layer on two baking sheets. They can touch but should not overlap, because overcrowding leads to soggy chips. If needed, bake in batches.
- Halfway through cooking, rotate the pans (top to bottom) for even crisping.
- You can make kale chips ahead. Store fully cooled kale chips in an airtight container at room temperature. They can stay crispy for up to two days, which is perfect for prepping ahead.
8. Easy Stuffed Peppers Skillet

Get all the cosy flavours of classic stuffed peppers without the hassle! This easy skillet version comes together in just 20 minutes, making it a quick, healthy weeknight dinner for kids. Using a colourful mix of bell peppers not only adds visual appeal but also makes the dish fun for kids.
By serving the ingredients in a deconstructed style, little ones can easily see what’s in their dinner, which is great for picky eaters. Plus, most of the cooking time is hands-off, so you can get other things done while it simmers.
This recipe is also super flexible: switch up the protein or use brown rice, white rice, or even cauliflower rice based on your preference
What You’ll Need
- Bell peppers – Fresh, sliced (or use frozen pre-sliced to save time)
- Ground beef – Any variety; drain excess fat. Ground turkey or chicken also works
- Crushed tomatoes – Plain or seasoned (with basil/Italian spices for extra flavour)
- Rice – Any kind: white, brown, long-grain, or short-grain
- Shredded cheese – Mozzarella is great, but any kind you prefer works
Seasonings:
- 1 tsp onion powder
- 1 tsp garlic powder
- 1 tsp dried oregano
- ½ tsp salt (or to taste)
Ingredient Swaps
- Meat: Use lean ground turkey or chicken instead of beef.
- Tomatoes: Swap crushed tomatoes with fire-roasted diced tomatoes or marinara sauce.
- Seasonings: Replace garlic powder, onion powder, and oregano with 1½ tsp Italian seasoning.
- Grains: Try cooked quinoa or pasta in place of rice.
Instructions
- Cook the Meat: In a large skillet over medium heat, cook ground beef (or turkey) until browned. Drain any excess fat.
- Add Peppers and Seasonings: Stir in sliced bell peppers, garlic powder, onion powder, oregano, and salt. Cook for 3–5 minutes until peppers soften slightly.
- Add Tomatoes and Rice: Pour in crushed tomatoes and cooked rice. Stir to combine everything well.
- Simmer: Reduce the heat and let the mixture simmer for about 10 minutes, allowing flavours to meld.
- Top with Cheese: Sprinkle shredded cheese over the top. Cover the skillet and cook until the cheese melts, about 2–3 minutes.
- Serve spoons into bowls and serve warm.
9. Pan-fried Brussels Sprouts with Lemon and Sweet Honey

Make these easy Pan-Fried Brussels Sprouts with Lemon and Sweet Honey for a fast and tasty dinner side. It has a gentle sweetness, a rich nutty flavour, and no bitterness at all.
What You’ll Need
To make this fast veggie dish, you will need the following:
- Butter without salt or olive oil: Choose either to cook the veggies. They keep them from sticking and also give extra taste.
- Fresh Brussels sprouts: Buy them fresh from the store. Since they are cut into thin pieces, they cook very fast. This is great when you’re short on time.
- Salted and roasted sunflower seeds (or another finely chopped seed or nut): If you’re unsure about giving nuts to children, look up safe ways to do it.
- Grated Parmesan cheese: Use Parmesan or Pecorino for the best flavour. Grated cheese works best here.
- A fresh lemon: The lemon adds a bright flavour and helps remove any bitter taste from the Brussels sprouts.
- Honey: Just a bit of honey brings all the flavours together nicely. (Skip honey for babies under 1 year old. You can use maple syrup or try my Brussels Sprouts Baby Food instead.)
Instructions
Cut the Brussels sprouts into even pieces so they cook at the same speed. You can also buy pre-shredded ones from the store to save time.
- Add salt and pepper to your liking.
- If the sprouts stick before they turn soft, pour a little water into the pan.
- They’re ready when they’re tender and still have a bright green colour.
- Don’t give honey to babies under 1 year old. You can skip the seeds if needed, too.
- If your kids enjoy them, you can place a cooked egg on top to boost the taste.
Note: If you do not have dairy, just leave out the Parmesan.
10. Steamed Cauliflower

Getting kids to enjoy their vegetables can be tough, but sometimes, keeping things simple, like this Steamed Cauliflower with Parmesan Cheese, makes it easier for everyone. This is one of the kid-approved vegetable recipes that is tasty and easy for the whole family to enjoy.
What You’ll Need
- Cauliflower: You can either cut a whole head into florets or use a pre-cut bag of florets. Frozen cauliflower florets also work well.
- Butter or olive oil: These add a rich flavour to the cooked cauliflower.
- Parmesan cheese: I recommend grated Parmesan for better flavour, though any shredded cheese your family prefers will do.
- Salt: Add to taste, if desired.
Instructions
- Rinse your cauliflower and gently pat it dry.
- Cut the cauliflower into bite-sized florets. Alternatively, save time by buying pre-washed and pre-cut florets. Be sure to remove the stems and leaves.
- Place the florets into a steamer rack inside a saucepan with about 1 to 2 inches of water. Cover the pot, bring the water to a simmer, and cook the cauliflower.
- Drain the cauliflower thoroughly. Stir in the butter or olive oil and top with Parmesan cheese.
Note: While we recommend Parmesan, feel free to substitute with shredded cheddar if you prefer.
Helpful Tips
- Try to cut the florets into similar sizes to ensure even cooking.
- For convenience, buy pre-bagged cauliflower to save time.
- Use a steamer basket that fits comfortably in a medium-sized pot.
- Season with salt to taste, or let the cheese bring in the flavour.
- If your kids enjoy extra flavour, add fresh herbs like chopped parsley or basil.
- Choose a cheese your kids love, such as Parmesan or shredded cheddar.
If you don’t have a steamer basket, you can’t simmer the cauliflower florets in a medium pot with 1 to 2 inches of water until tender. Make sure to cover the pot and stir once to help the veggies cook evenly.
The Takeaway
To sum up, kid-approved vegetable recipes can change how your family eats. They are quick to make and fun to serve. Also, they bring joy to your dinner table. Instead of struggling, you can now smile when kids eat vegetables.
These recipes are made to please little ones. At the same time, they help parents feel proud. Because healthy eating should not be hard. In fact, with a few smart tricks, vegetables can become your child’s favourite foods.
Try mixing colours, shapes, and dips. Use cheese, herbs, or light sauces to boost flavour. Let kids help in the kitchen, too. That makes them excited about food. And always try new things. Every small change can make a big difference.
So start now. Choose some kid-approved vegetable recipes from this list. Cook them with love. Watch your children enjoy every bite. With these kid-approved vegetable recipes, healthy eating can finally be fun and stress-free.