Simple science experiments for early learners make learning exciting. Young kids love to explore and ask questions every day. These experiments help children understand how the world works. They teach basic science ideas in a fun and easy way.
First, kids see how things change and react. Then, they learn to predict what might happen next. Hands-on activities also build problem-solving skills. Parents and teachers can enjoy these simple science experiments for early learners together. The projects are quick and safe, and they need a few supplies.
In this article, we will share easy ideas that spark curiosity. These simple science experiments for early learners will make science a favorite subject for kids.
Why Science Experiments are Necessary for Early Learners
Simple Science Experiments for Early Learners That Spark Curiosity and Fun
Fed up with flipping through those dull and tiresome science textbooks? Are your classic chemistry puns still failing to spark a reaction? Well, it might be time to give some of these super simple science experiments for early learners a try—perfect for both the classroom and home.
You won’t have to spend a fortune on fancy tools, rare substances, or heavy-duty safety gear (no need to suit up like a scientist heading into a chemical disaster zone). These experiments are simpler than watching an apple fall from a tree (apologies to Sir Isaac Newton!).
Not only are these simple science experiments for early learners packed with excitement, but they also deliver valuable lessons on key scientific ideas. So, whether you need a reality check with a gravity-themed activity or you’re eager to dive into our ‘Save the Egg’ challenge, keep reading—you’re in for a treat!
Below are the top 35 simple science experiments for early learners:
1. Can You Clean Dirty Water?
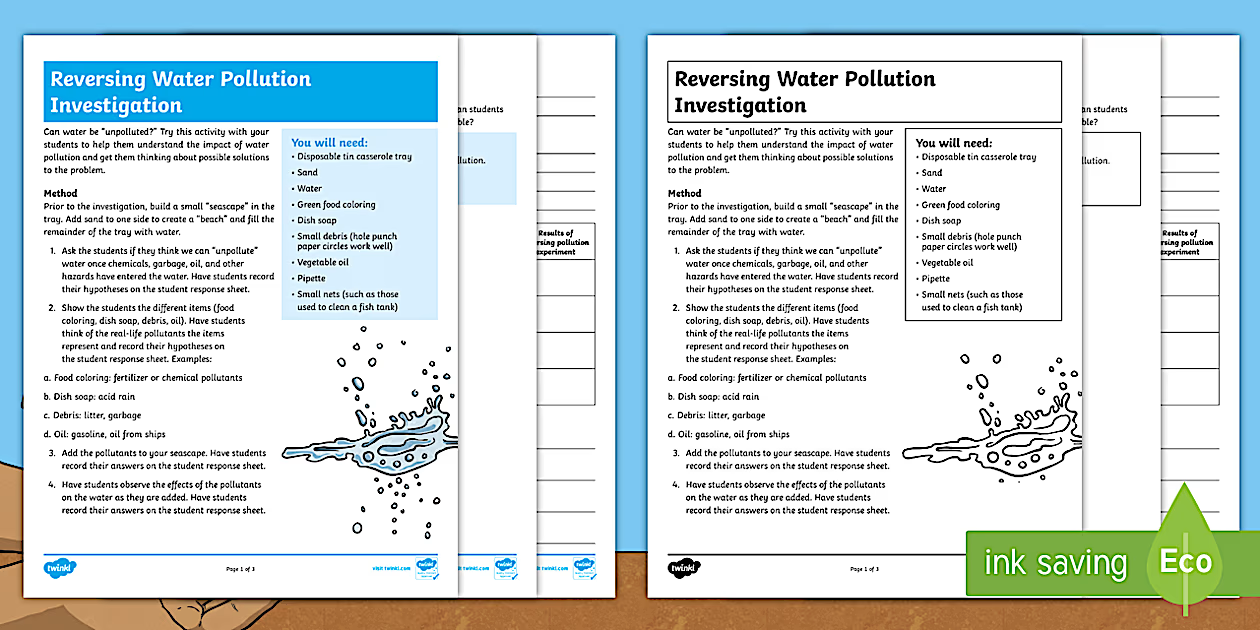
Protecting our water is very important, and this simple experiment will help you see why! Begin by creating your own little ocean scene in a tray. Pour in some water and even build a small sandy beach if you want. Next, mix in different kinds of pollution like oil, soap, or bits of trash. Then, challenge yourself or your friends to remove the pollution and make the water clean again. You’ll soon find that it’s not as easy as it looks! Keep watching how the water moves to understand more about pollution.
2. inflate a Balloon Without Blowing!
If you want to wow your friends with science, this quick balloon trick will do it. Start by pouring some vinegar into a bottle. Then, put baking soda inside a balloon. Gently fit the balloon onto the mouth of the bottle. When you lift the balloon so that the baking soda drops into the vinegar, a bubbly reaction will make the balloon fill up with air—no blowing needed!
3. Sound Blocking Test

Ever wondered how sound travels through the air? You can try this fun experiment to learn about it. Take a few paper cups and gather materials like cotton, foil, or bubble wrap. Put these items inside the cups to cover your ears while playing music nearby. Notice how different materials change what you hear. You might even find a way to enjoy complete silence!
4. The Leak-Proof Water Bag

This activity feels more like magic, but it’s all about science! Grab a plastic bag with a zipper seal and fill it halfway with water. Next, quickly push sharp pencils through the bag. You’ll be amazed—the water won’t spill out! This works because the plastic stretches and forms a seal around each pencil.
5. Create Your Own Rain Cloud
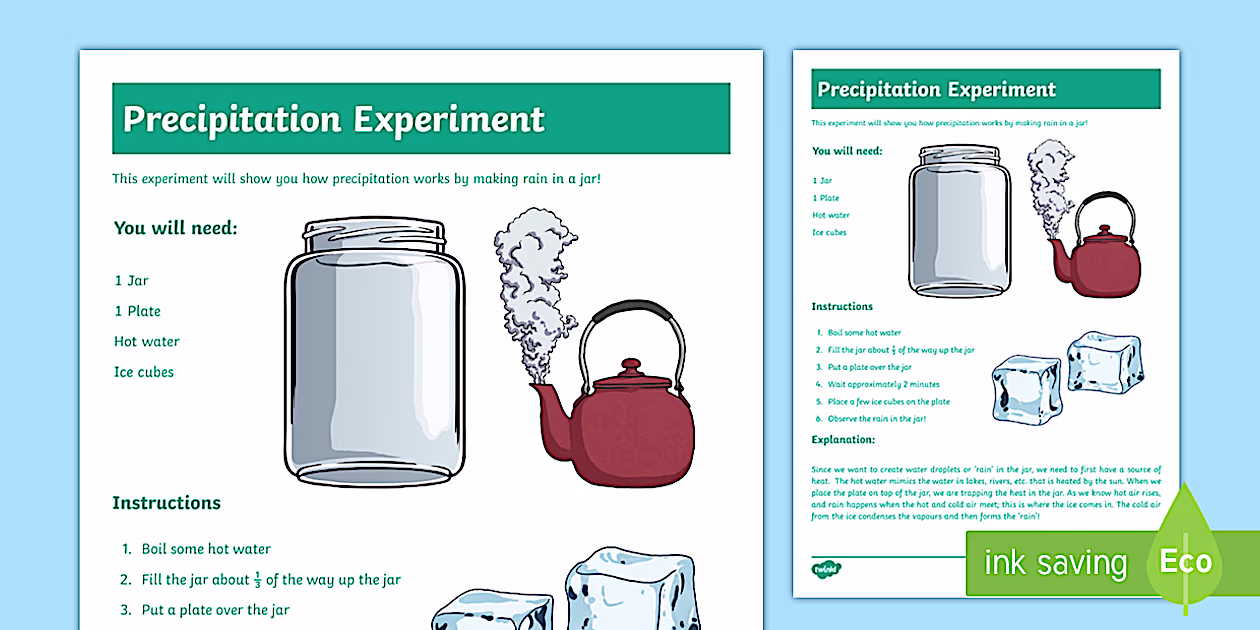
Have you ever wanted to make rain fall indoors? Now you can! First, pour hot water into a jar until it’s about one-third full. Cover the jar with a plate right away and wait for two minutes. Then, place some ice cubes on the plate. Watch closely—you’ll see droplets form inside the jar, just like rain!
6. Test the Power of Magnets
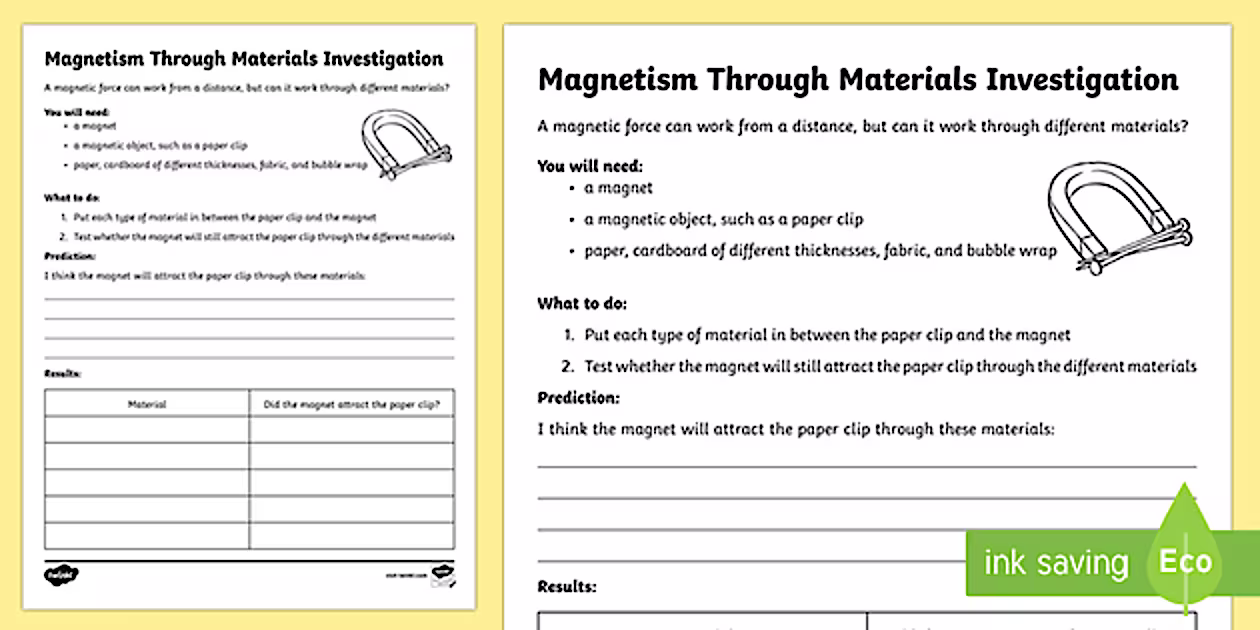
Who has the strongest magnet? Let’s find out with this ome of these simple science experiments for early learners. Collect a few magnets along with paper, bubble wrap, and cardboard. Also, get some paper clips. Test which magnet can pull paper clips through the different materials. The winner gets bragging rights as “Magnet Master” for the day!
7. Colorful Skittles Pattern
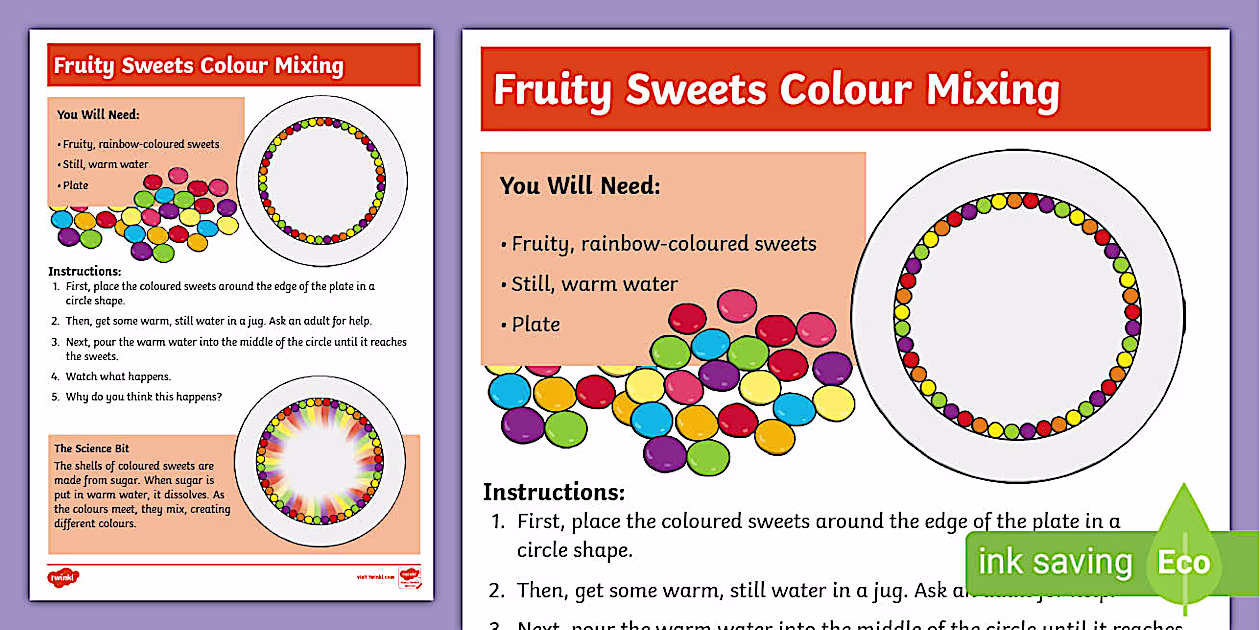
Why just taste the rainbow when you can see it too? Place colorful Skittles in a circle on a plate, using any pattern you like. Pour warm water slowly into the middle until it reaches the candies. Watch as the colors spread across the plate, forming a beautiful rainbow-like design.
8. Lava Lamp at Home
If you love bright, moving colors, this homemade lava lamp is perfect! Fill half a glass with water, then slowly add oil until it reaches the top. Drop in some food coloring and break an Alka-Seltzer tablet into small pieces. Toss them in and watch as the colors bubble and swirl just like a retro lava lamp.
9. Turmeric Color Test

Ever wondered how turmeric can change color? Start by mixing turmeric powder with water in a jar. In two other jars, mix water with baking soda in one and lemon juice in the other. Take a spoonful of turmeric water and slowly add drops from the other mixtures. See the color changes and discover how turmeric works as a natural indicator.
10. The Egg Bottle Trick

Want to amaze someone with an egg experiment? Here’s how. Boil an egg and find a glass bottle, like an old milk bottle. Light three matches and drop them inside the bottle. Quickly place the egg over the opening. When the matches go out, watch as the egg gets sucked into the bottle because of the air pressure change.
11. Watch Seeds Sprout

Curious to see nature come to life? This simple activity lets children observe the magic of plant growth up close. Take a jar or clear bottle, place some paper tissue inside, and position the seeds where they can be easily seen. Keep the paper damp by watering it daily, and soon, you’ll witness the seeds sprouting right before your eyes!
12. Fizzing Orange Surprise

Ever wondered what it’s like to taste a fizzy orange treat? This fun food experiment will make your taste buds dance. First, cut an orange into wedges. Then, sprinkle about half a teaspoon of baking soda over each piece. Wait for around half a minute, then take a bite and enjoy the surprising fizz sensation!
13. Sled Builders!
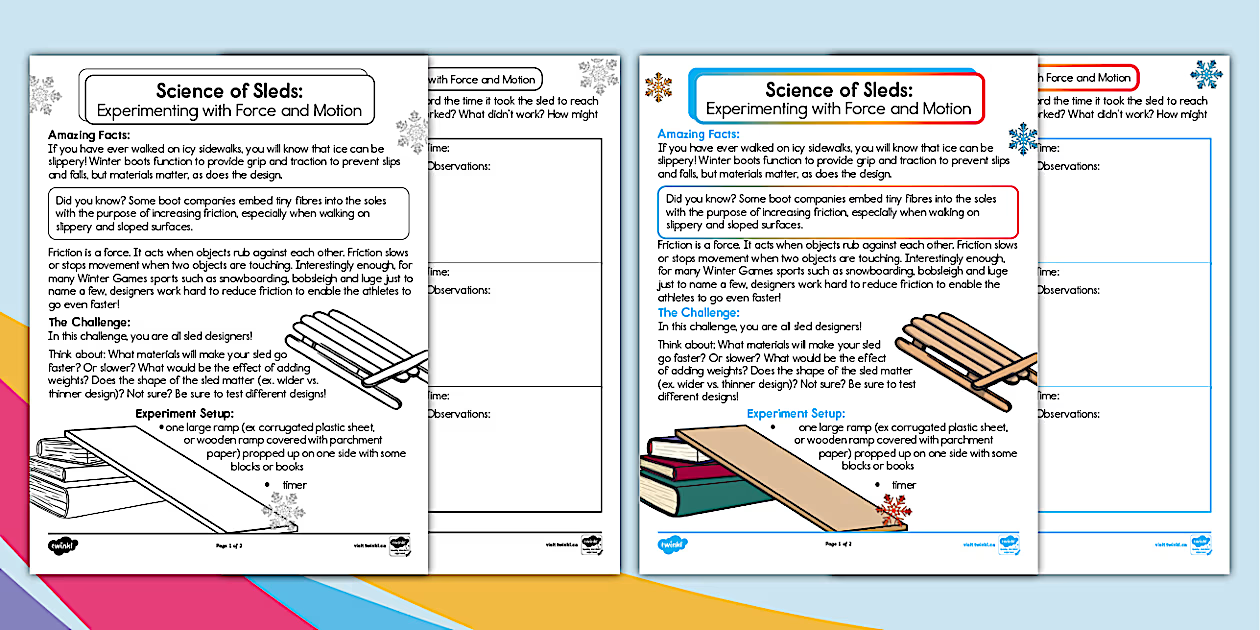
Had a few test runs but still sliding into trouble. Switch things up by trying this sled-building challenge. Test different materials to discover which one makes the best sled. This is a fantastic hands-on activity to get young minds eager for snowy winter adventures.
14. Save the Egg!
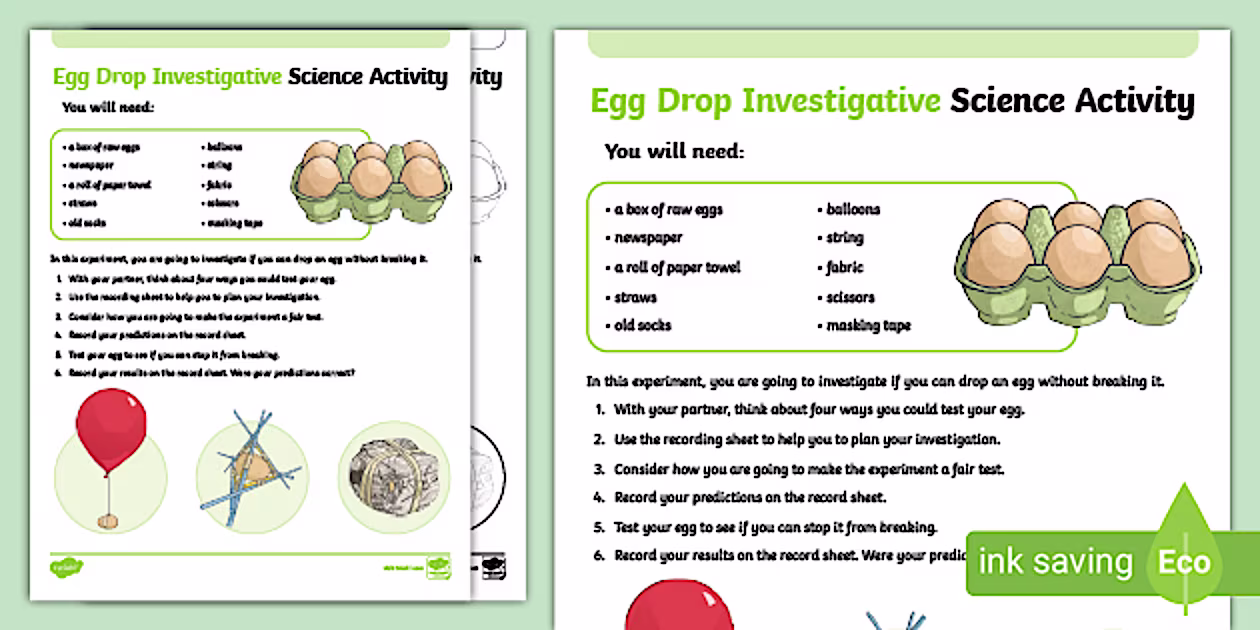
This classic science challenge is always a hit. While we’ve shared a simple guide, don’t be afraid to get creative and think outside the box. The goal is to design a structure that protects an egg from breaking when dropped. It’s a great way to explore engineering ideas – just remember, keeping that egg safe is your number one mission!
15. Small-Scale Climate Change Demo
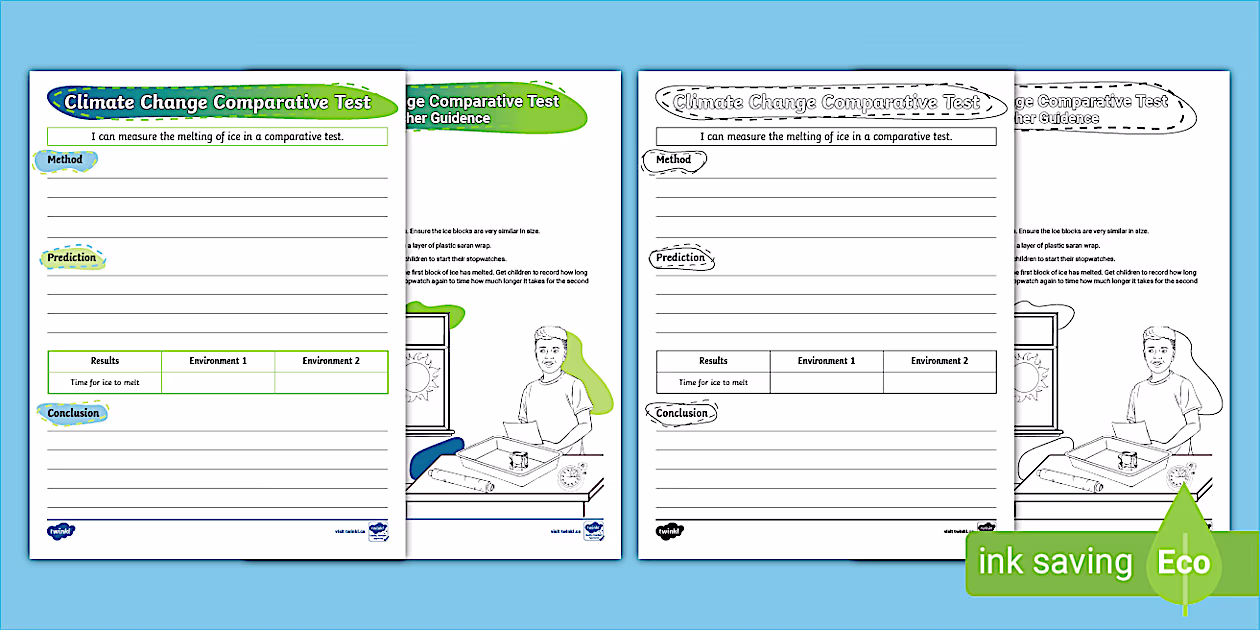
There’s no denying that our planet’s climate is changing, which makes it vital to teach children about it early on. This easy-to-follow experiment requires just a few basic supplies but delivers a powerful message. Tap the picture below for complete step-by-step instructions to get started.
16. Floating Fish Experiment

Here’s another simple activity that focuses on both density and solubility.
- Start by using a dry-erase marker to sketch the shape of a fish on the base of a glass tray or flat plate. Go over the lines again to ensure they are fully connected without any gaps. Allow the marker ink to dry for a minute or two before moving on.
- Next, take a measuring cup and fill it with regular tap water. Carefully position the spout close to one corner of the dish, and gently pour the water in very slowly until it just covers the base. Be cautious not to pour water directly on the fish drawing or cause splashes around it. You will see the water gradually spread and surround your fish sketch. Watch closely to see what occurs. If the fish does not lift, or water splashes mess up your attempt, pour out the water, wipe the drawing away with a paper towel, dry the plate thoroughly, and repeat the steps.
- Now, slightly tilt the dish from one side to the other. Observe the outcome and make a note of what you see.
Explanation:
Dry-erase markers are designed to have slippery ink. The special ingredient in this type of marker allows it to come off surfaces easily. (In contrast, permanent markers contain a different chemical that makes their ink stick tightly, so avoid using those for this activity.)
But why does the drawing not only release but also float? This happens for two main reasons. Firstly, the dry-erase ink is not soluble; in other words, it doesn’t dissolve in water. Secondly, the ink is lighter than water, meaning it has lower density. This makes it buoyant, which is why it floats. When you tilt the dish, your fish drawing will glide around on the surface of the water.
17. Teeth Experiment: Brush, Brush

This fun activity will surely excite kids about brushing their teeth once they discover the scientific proof of how toothpaste works to protect their smiles.
- First, grab a few sticky notes and label them: Juice 1, Juice 2, Soda 1, and Soda 2.
- Arrange these labels in a line on a countertop.
Next, pour brown soda halfway into two cups and set them behind the sticky notes marked Soda 1 and Soda 2. Then, fill another two cups halfway with lemon juice and place them behind the labels Juice 1 and Juice 2. - Take an egg and place it in a bowl. Squeeze about a tablespoon of toothpaste onto the egg and use your hands to carefully spread the toothpaste all over it, creating a thick coating. Do the same with a second egg.
Important Steps:
- Now, lower each toothpaste-covered egg into a drink: put one in the cup labeled Juice 1 and the other into the cup marked Soda 1. Make sure to wash and dry your hands afterward.
- Take the other two eggs, which are not coated with toothpaste, and place one in the glass labeled Juice 2 and the other in the glass marked Soda 2. Again, wash and dry your hands. Let the eggs sit in the drinks for 12 hours.
- After 12 hours have passed, take out the eggs from the soda glasses one by one. Rinse them under cool water and pat them dry with a towel. Put each egg near the sticky note of the glass it was in. Can you notice any differences in their appearance?
- Do the same with the eggs from the lemon juice glasses. Rinse them under running water, pat them dry, and place them beside the sticky notes that match their cups. Now, carefully feel each egg. Does one feel harder or softer than the other?
- Record all your observations in your science journal.
Explanation:
This experiment helps show how eggshells are like the enamel that covers your teeth. Toothpaste is important because it helps remove bits of food and drinks that stick to your teeth and prevents stains. Dark-colored drinks such as cola, tea, or coffee can easily stain teeth. The egg without any toothpaste will likely turn brown and show stains. On the other hand, the toothpaste-covered egg is shielded from discoloration.
Toothpaste also prevents damage to your teeth. The egg without toothpaste that was left in lemon juice became soft and weakened, while the egg with toothpaste stayed strong. Lemon juice is acidic, and acids can break down the eggshell just like acidic drinks can damage your tooth enamel. When your teeth wear down, cavities can develop faster. However, the fluoride in toothpaste works with your saliva to form a protective shield around your teeth. This coating helps keep your teeth strong and defends against cavities.
18. Planting an Avocado Tree

A simple and fun way to teach your family about Earth Science is by growing an avocado tree using its seed. You could purchase an AvoSeedo kit for convenience, or instead, peel the pit and balance it above a container of water with the help of a few toothpicks.
Get the tutorial at: https://www.goodhousekeeping.com/home/gardening/a26064095/how-to-grow-avocado-tree/.
19. Glass Bottle Xylophone

Get ready for an exciting experiment with sound!
- Start by lining up six identical glass bottles or jars without lids. Before doing anything else, try tapping each empty jar with a spoon. What do you think they will sound like? Make a prediction, then tap each one and take note of your observations.
- Next, begin filling the jars with water. Pour ¼ cup (60 ml) into the first jar, ½ cup (120 ml) into the second, and continue increasing the amount by ¼ cup for each jar. The third should have ¾ cup (180 ml), the fourth 1 cup (240 ml), the fifth 1¼ cups (300 ml), and the sixth 1½ cups (360 ml). To make it more fun, add a few drops of food coloring to each jar.
- Now, think about what might happen when you tap them again. Will the sounds be different from when the jars were empty? Will each jar make the same sound, or will they vary? Write down your predictions.
- Take a metal spoon and gently tap each jar. Record your observations about the pitch of the sounds in your notebook. Pitch refers to how high or low a sound is.
Explanation:
You might wonder why the jars sound different. Sound is created through vibrations. Vibrations are movements that go back and forth repeatedly. When something vibrates, it produces sound waves. The pitch—whether a sound is high or low—depends on the frequency of these waves, meaning how many waves are formed in one second.
High-pitched sounds are made by sound waves with a high frequency. They can often sound sharp or squeaky. On the other hand, low-pitched sounds are produced by waves with a low frequency, and they can sound deep and rumbling.
When you tapped each jar, it caused vibrations. These vibrations moved from the jar, through the water, into the air, and finally reached your ears. The jars containing more water had lower-pitched sounds. This is because the sound waves moved slower since they had to pass through more water.
Meanwhile, the jars with less water produced higher-pitched sounds. The sound waves traveled faster because there was less water for the vibrations to pass through. An empty jar created the highest pitch of all, as the sound waves had the least amount of material to move through.
20. Foaming Elephant Paste

No, elephants aren’t actually scrubbing their teeth with this frothy mixture, but this exciting experiment demonstrates a fascinating chemical reaction. When yeast, dish soap, hydrogen peroxide, and a few other everyday items come together, a bubbly eruption bursts out of the container like oversized toothpaste. This activity is a great way to introduce kids to exothermic reactions and the role of catalysts in speeding up chemical processes.
Get the tutorial at https://babbledabbledo.com/amazing-science-how-to-make-elephant-toothpaste/.
21. Popsicle Stick Energy Blast

Children can explore the difference between kinetic energy (energy of motion) and potential energy (stored energy) through this thrilling chain-reaction activity. By weaving together craft sticks, tension builds up. Once the last stick is removed, the stored energy transforms into motion, sending the sticks and any small objects like pom poms soaring into the air.
Get the tutorial at https://www.science-sparks.com/make-craft-stick-chain-reaction/.
22. Homemade Magnetic Compass

Discover how magnetic forces shape our world by making your own simple compass at home. Start by rubbing a needle against a magnet to magnetize it. Then, place the needle on a floating surface in water. Watch as it aligns itself, always pointing north. Kids can even spin it around, and it will still find its way back in the correct direction, showing how Earth’s magnetic field influences objects.
Get the tutorial at https://www.steampoweredfamily.com/how-to-make-a-compass/.
23. Invisible Ink Magic

Let children feel like undercover agents by helping them create hidden messages that appear as if by magic! Using a heat-free technique, they can uncover colors and images drawn with invisible ink. Experiment with different acidic and basic substances to see which combinations create the most surprising and vivid results.
Get the tutorial at https://researchparent.com/color-changing-invisible-ink/.
24. Bridge Made of Paper

Bring the “E” for engineering into STEM by encouraging children to design a paper bridge capable of holding the maximum number of pennies. In what ways can they adjust the paper to make it stronger? (Tip: Try folding it!).
See the tutorial at https://kidsactivitiesblog.com/26605/build-a-bridge/.
25. Frozen Ice Trick

Give your young scientist a fun challenge: pick up an ice cube using only a string. It may sound tricky, but with the help of a little salt, it works! Salt causes the ice to melt and lowers its freezing temperature. As the ice absorbs heat from the water, the water gets cold enough to freeze the ice back around the string.
See the tutorial at https://www.playdoughtoplato.com/sticky-ice-science-exp/.
26. Mini Marshmallow Launcher

Kids can explore potential and kinetic energy by building a catapult to launch small marshmallows through the air. Try adjusting different factors and observe how those changes alter the distance and direction the marshmallow travels.
See the tutorial at https://www.hellowonderful.co/post/diy-marshmallow-catapult/.
27. Leaf Breathing Bubbles

It can be difficult for children to understand that plants and trees “breathe” through their leaves—until they see it for themselves. Submerge a leaf in water and watch bubbles form. You can also introduce photosynthesis by placing leaves in areas with different sunlight levels.
See the tutorial at https://www.kcedventures.com/how-do-leaves-breathe-a-simple-science-experiment-for-kids/.
28. Straw-and-Hoop Glider

Many of us learned to fold traditional paper airplanes with sharp, triangular wings, but these straw-and-hoop planes fly straighter and farther. Try changing the hoop sizes or the straw length and see how each adjustment changes the airplane’s flight path.
Tutorial: https://www.mombrite.com/how-to-make-a-straw-airplane/.
29. Inertia with Coins

Let’s start with an experiment that shows how objects like to stay where they are! Gather about five or more coins and carefully stack them on top of a small piece of cardboard. Set the cardboard on the mouth of a drinking glass filled with water. Now, with a quick flick of your finger, swipe the cardboard away.
What do you think will happen? Will the coins follow the cardboard, or will they fall into the water? Try it and see! Because of inertia – the tendency of objects to stay at rest unless something moves them – the coins drop straight into the glass. This is a cool and easy way to see Newton’s First Law of Motion in action.
Tutorial at: https://www.engineeringemily.com/easy-coin-trick-to-learn-about-inertia-and-newtons-first-law-of-motion-steam-activity-for-kids/.
30. Rocket Launch Using Film Canisters

Prepare for lift-off! You don’t need actual rocket fuel – just a few common household items. Take an empty film canister (or a tube from Airborne vitamins, if that’s what you have) and get ready. When you mix baking soda and an Alka-Seltzer tablet with water, the pressure builds up. Once it gets high enough, the canister pops off with a blast, shooting into the air like a tiny rocket. It’s an exciting way to see chemical reactions create gas, which leads to a launch!
31. Fossils with Coffee Grounds

Have you ever wondered how fossils are made? Here’s a fun way to explore the idea. Start by making salt dough, but this time mix in coffee grounds. After shaping the dough, press small objects into it, like seashells or toy dinosaur feet. Once the dough dries, it leaves behind impressions that look like fossils. If you poke a small hole before it hardens, you can even hang your fossil creations as decorations. It’s a great hands-on activity to help kids picture how real fossils form over time.
Tutorial: https://craftsbyamanda.com/coffee-ground-fossils/.
32. Apple Browning Experiment

Have you ever noticed that apples turn brown after you cut them? Here’s a chance to test what prevents that! Cut an apple into slices, then place each slice into a different liquid, like lemon juice, vinegar, or plain water. After a few minutes – maybe three, then six – check the color of each apple piece. Which one stayed the freshest? This is a perfect experiment for practicing the scientific method because you can make guesses, or hypotheses, before starting.
Tutorial: https://jenniferfindley.com/apple-oxidation-science-experiment-free-science-reading-activity/.
33. Water That Walks

Here’s a colorful experiment that will amaze you! Set up six cups of water in a circle. Fill three of the cups with clear water. In the other three, mix in food coloring: red in one, blue in another, and yellow in the last. Arrange the cups so that every colored one sits next to a clear one.
Then, fold some paper towels and place them like bridges between each pair of cups. Watch closely – the colored water will slowly move up through the paper towel and drip into the clear cups. Soon, the colors will mix and create new ones, showing you how water can “walk” through a process called capillarity.
Tutorial: https://funlearningforkids.com/rainbow-walking-water-science-experiment-kids/.
34. Chromatography Flowers

Want to see hidden colors in your markers? Try this experiment. Take a coffee filter and use different markers to draw colorful lines around the edges. Fold the filter into a cone shape, then dip the tip in water. Slowly, the water will climb up the paper, separating the marker ink into its different pigments. You’ll get a cool pattern that looks like a flower. You can even add an LED light to the center to make your chromatography flower shine even brighter as a craft project.
Tutorial: https://www.steampoweredfamily.com/activities/build-a-circuit-flower/.
What We Leave You With
Picture yourself creating the biggest bubbles you’ve ever seen—or even forming tiny bubbles inside larger ones. Think about sending objects like rockets, paper airplanes, or even tea bags flying across the room for astonishing distances. Now, picture mixing a few simple ingredients to cause explosions, make colors shift, or uncover secret messages.
None of this is magic—it’s all simple science that you can easily try at home, using everyday items you probably already have in your kitchen or cabinets. So, the next time you’re looking for an indoor activity to chase away boredom on a rainy afternoon, or you need a hands-on project to get kids thinking creatively, give these awesome at-home science experiments a try. They introduce fun ideas from fields like physics, surface tension, chemistry, astronomy, magnetism, and more.
Before anything else, it’s a smart idea to introduce kids to the scientific method. Provide them with a journal where they can write down their guesses, observations, questions, experiments, outcomes, and what they learn at the end. And, as always, safety is key: have them wear protective goggles, aprons, or lab coats if needed (kids often enjoy dressing up like real scientists), and be sure an adult is always nearby while they’re experimenting. (Just a heads-up—some of these projects can get pretty messy!)
Most of these experiments are created with preschoolers and elementary-aged kids in mind—though a few work better as demonstrations or are ideal for older children. If you have a little one at home, you can also check out these learning activities for toddlers, preschoolers, and kindergartners, which also touch on STEM topics.